In the era before the invention of color photography, photo editors would spend hours meticulously painting color onto photos with a fine brush.
Colors are evocative, enticing, and add a realistic element to black-and-white images, connecting the observer and the subject.
Today, AI outshines traditional editing techniques, offering quick and precise color enhancements with just a few clicks. I’ve tested several online AI colorizers to bring monochrome photos to life.
Having experimented with both color and black-and-white imagery for decades, I’ve seen firsthand how colorizing photos has always captured people’s imagination. And with AI, it’s never been easier.
In this article, I’ll walk you through how to use AI image colorizers to breathe new life into black-and-white photos.
Let’s face it, AI is here to stay, so it is worth learning how to take advantage of the time-saving AI photo editing capabilities.
How to Use AI to Colorize Images
If I’m honest, black-and-white photography was my first love, and it still remains one of my favourite genres of photography.
Black and white is the king of texture. Photographers will use black and white when they want to focus the viewer’s eye on contrasting textures.
However, when there is no hidden texture, but instead many similar shades of grey, it will result in a flat, dull photo.
When a black and white photo I like lacks texture and depth, I experiment with a rescue edit – adding color.
This used to be time-consuming, but now, using AI colorizers, I can quickly flip from black and white to vibrant color.
AI colorization is also effective when you wish to restore and revive vintage pictures with minimal effort.
Let’s take a deep dive to learn how to utilize these fantastic AI tricks to bring your washed-out images to vibrant vitality.
Hop On An AI Colorizer App
Head to your favorite AI app—maybe it’s Media IO, Palette, or YouCam—and upload your black-and-white photo.
I’ve put together a list of the best AI colorizers here.
For colorization, I usually use Palette, as I find their free version to be the most concise.
Step 1: Upload your monochrome photo
To begin, click Upload and locate your image, or drag and drop your image onto the AI app page.
Your image will land on the webpage, and you can start the colorization.
Step 2: Wait for AI magic to unfold
If you’re using Palette, your photo will start to colorize immediately.
Don’t fret if it appears to stall; depending on the speed of your internet, it may take between a few seconds and a minute to colorize.

If you’re using HotPot to colorize, you will need to first select a Colorization Factor in the left panel. Once selected, click the blue arrow to begin colorization.
Medio and YouCam will colorize your image as soon as it’s uploaded to their site.
The AI app has completed the heavy lifting, and within seconds, the image is colorized.
Step 3: Select filter or enhance
Different AI apps have different colorizing options, so you can fine-tune your colorization.
Palette offers a variety of colorizing filters, such as Base Palette, Lavender Dusk, Vivid Natural, and Warm Glow.
You’ll find previews of the filter in the top bar above the workspace. To apply the filter, click on one, and your image in the workspace will be transformed.

In the image above, I selected the filter “Colorful Memories” to add more vibrance to my flower.
If you want to keep the colors as close to the original color as possible, select “Base Palette.”

To flip back to the monochrome version of your photo, click original.
YouCam, another popular online AI photo editing suite, also gives the option ot select different filters.
You can test the filters to find the most authentic-looking tones for your image.

As you can see above, YouCam’s filters are in the top right-hand corner of the workspace. Click on a filter preview to apply it to your photo.
Step 4: Review the colorization
To preview the before-and-after versions of your photo, YouCam has incorporated a neat sliding bar; slide it from right to left to view your image in its original format.
AI colorizers will not get the color tones or hues correct all the time (in my humble opinion, they never do).
The calculation of AI image colorizers from grayscale to color can be completely off target.
Below is a photo I took of two young girls holding the Vietnamese flag while I was traveling through Asia.

I uploaded this photo to Media’s website for colorization.
As you can see, the young girl in the background has had her face colored into a rather illuminous red, not exactly a natural facial tone.
Now, AI may be able to color your image in a second, but the downside is you will need to prepare yourself for the fact that not all colorizations will be perfect.
AI’s ability to select the right colors will depend on the depth of machine learning that the AI app you are using has undergone.

As you can see above, HotPot’s Old Photo Restorer has added colors to the roof and skin tone, but has incorrectly chosen the wrong hues, specifically blue for red and red for yellow.
If you’re happy with the hues and saturation of the colorization, zoom in to check the image for errors.
One common AI colorization blunder to watch out for is color leakage around the edges of objects.
As you can see below, the blue color of the girl’s shirt has been leaked into the flag’s stick.

When this happens, I clean up the AI-generated content using Photoshop.
Step 5: Polish up AI colorization errors
YouCam, Pallet, and their counterparts also offer a range of AI post-colorization manual editing tools for final adjustments and edits.
When AI falls short, I jump in and use Photoshop to finish and fine-tune the job.
Step 6: Download your image
Now it’s time to download your image.
Watch out for watermarks. Some websites will imprint their logo onto your photo before you download it, as you can see in the image below.

If you wish to remove this, you can pay a small fee or upgrade to a paid subscription, and you will be able to download the image watermark-free.
If you want to reap the rewards of superior edits, upgrading to premium can be a great idea.
Photoshop’s AI Colorization
Photoshop has both a manual and an AI quick fix for photo colorization.
Colorizing with Photoshop’s AI and then tweaking the job manually is an excellent option for those who prefer to minimize manual editing work as much as possible.
To use Photoshop’s AI colorization, upload your monochrome photo and select Filter from the top menu bar.
From the Filter drop-down menu, select Neural Filters.
The Neural Filters workspace will open. Click the toggle button beside Colorize.

Photoshop’s AI will convert the grayscale to color. You can then adjust the tones and hues using the sliding bars on the right-hand side of the panel.

When you are satisfied with the results, hit the OK button.
The Mechanics Behind AI Colorizations
You might wonder if we can trust AI to select the correct color. Will its color selection be accurate?
And you can’t be blamed for wondering, given how quickly the colorization process is completed.
AI uses machine learning and algorithms to apply the correct color to the grey scale. To achieve this, AI must be trained on thousands, if not millions, of images.
The more images used ot train AI, the more precise the result will be.
After machine learning, AI can decipher the intricacies of the grey scale. This means the colors selected will be less random.
Is Accurate Colorization Beyond AI?
So, when trained on the many shades of grey, can AI quickly and precisely select the exact color of your great aunt’s teapot?
I’m sorry to be the bearer of bad news, but the short answer is no.
Now, let’s be clear, AI is the master of focus and speed; this can not be denied.
But it turns out that discerning the nuances of which hue to apply is a more complex task for AI than coding a website.
The reason it’s difficult for AI to colorize accurately is that it’s striving to leap from a one-dimensional world to a three-dimensional world.
Grayscale is a 1-D model, whereas the RGB color model is a 3-D model built on the primary colors of red, green, and blue.
Plus hue, saturation, and lightness are present in color; however, in grayscale, only lightness is evident.
This essentially makes colorization a very tricky task for AI, and sometimes impossible for it to know.
Therefore, it defaults to guessing objects’ colors, coloring a dress a different hue, or a flower a richer saturation.
Luckily, often selecting the precise hue and saturation isn’t important.
Sometimes, we just want to bring a bleak black-and-white photo to life in the blink of an AI eye, and at this, AI works a dream.
Human colorization experts spend hours coloring an image.
Manual colorization doesn’t just involve the manual labour of painting the photos’ pixels, but it also includes color research via databases, libraries, and even phone calls.
This makes the manual colorization of photos a time-consuming and expensive task.
Are all AI Apps Created Equally?
The best apps will cost, that’s a no-brainer. When you have to invest time and energy to train Artificial Intelligence, you want a return.
There are open-source AI apps that work a treat, and they’re always worth familiarising yourself with if you intend to colorize regularly.
Some AI apps specialize in colorization. If you have a one-off job and want it to look professional, I would suggest considering paying.
When to Colorize an Image
Black and white has its own unique appeal. It’s the master of revealing texture, which color distracts the eye from.
However, when the shades of grey lack contrast or there are no contrasting textures in the image, it will appear lifeless.
The subject matter will appear to be camouflaged into the background, creating a flat image.
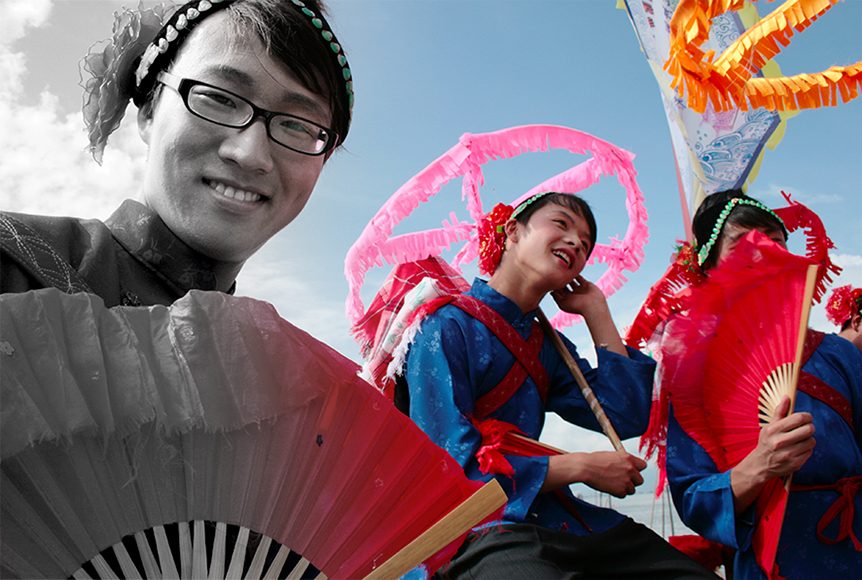
This is the case in the image below: when the image is black and white, it lacks vitality.

When a monochrome photo lacks depth and needs an extra sprinkle of life, it’s time to colorize.
When I have a dull image, I experiment with color techniques—amping up the contrast and color to add the much-needed zest to bring it back to life.
Color photos have a sensory effect on the brain, triggering memories.

They are closer to real life and can be used by photographers to bring their viewers closer to the subject.
Color evokes emotions and connection at times when black and white cannot.
This means that when you see a color photo, you’re more likely to relate to the people in it. On the other hand, when it’s black and white, you will feel like you are viewing fictional characters.
You don’t want to simply add color to your photo; anyone can do this. You want to make a masterful color strike to impress.
You can take your photography practice a step further and draw on some of the dynamic principles of color theory to elevate it.
Look into color contrast photography, selective color photography, and color splash photography.
Final Thoughts
Anyone who has bucket loads of photos to edit will praise the heavens for the arrival of AI colorizers.
Instead of taking hours to paint over greyscales and guess a color, a specialised AI app will colorize it in seconds.
It’s fun to watch vintage images magically come to life with fresh color.
The only issue is that you cannot rely on AI colorizations to be completely accurate.
Decoding the greyscale and assigning the correct color is a tricky job.
I’m not denying that they can be remarkably close to spot on, and heck, they will look realistic.
…but if you require true color precision, you will have to hire a human expert.
However, let’s be honest, human colorizers also have to play a guessing game or conduct extensive research when embarking on the same task.
The way I like to use AI to color my vintage and monochrome photos is to give it the freedom to go wild and select colors.
The results are often bold, vibrant, and striking—sometimes even more spectacular than what you’d see in real life.
Who wouldn’t want to try magical AI image colorizers to enhance their digital black-and-white photos?
Credit : Source Post