
If you enjoy playing card games, you’ll love having custom photo cards.
In this tutorial, I’ll guide you through the process of creating your personalized playing cards using your favorite photos.
This DIY project is also a fun way to spend time with your kids, a cool party gift, or a prize for your next game night.
Let’s shuffle up and deal out some beautiful memories through photo cards.
Here are some more fun DIY photo projects for you to try:
Materials
- A deck of playing cards
- 52 photos printed 3.5″ x 2.5″
- Glue or double-sided tape
- Scissors
Process
If you want custom playing cards, there are websites where you can order them. However, this may be pricey, or you may not find one that delivers to your area.
Plus, you’ll only get to choose one picture for the entire deck.
So, if you want to stay on a budget, use more than one photo, or simply enjoy crafting projects, you can make your own. Here’s how.
Step 1

The standard size of playing cards is 3.5″ by 2.5″ (9 x 6.5 cm.). If you have one of these decks, you can skip this step.
However, if you have a fantasy deck, bridge cards, or any other type of deck, you should measure the size of the cards.
Step 2
Now, you’ll need 52 images the size of the cards. However, you don’t want them to be all different – otherwise, the other players may memorize them and know your hand.
So, I will use four different photos to repeat 13 times. I chose this number because the most convenient print size for me is 7″ x 5″ sheets, which fit four 3.5″ x 2.5″ photos.
You can choose whichever number is best for you – just remember to have them repeat enough times to keep the game interesting.
Step 3
Once you know which photos you want to use, you need to resize them and prepare them for print.
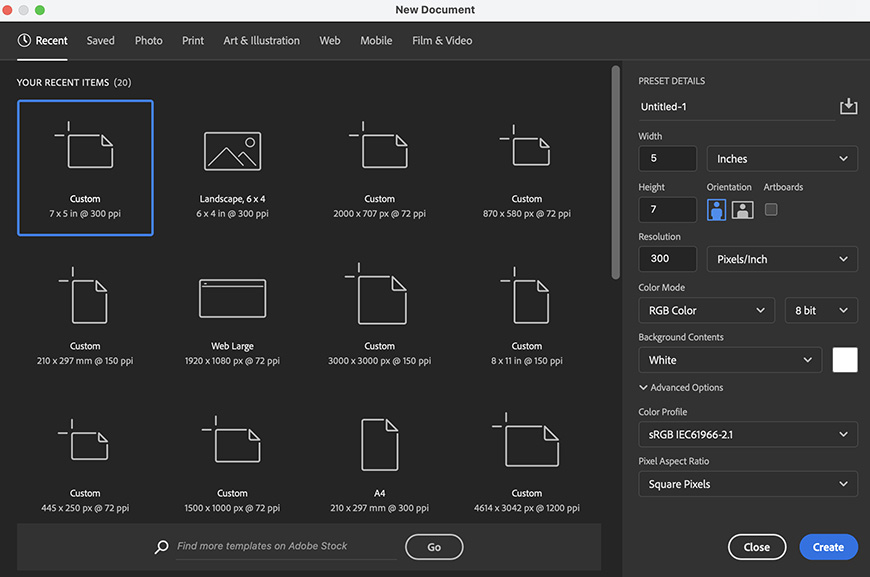
You can do this in any photo editor you want – I prefer Photoshop. Here, I created a New document sized 5″ x 7″.
Step 4

Then, using the frame tool, I’ll make four placeholders sized 3.5″x 2.5″. I just need to click and drag to create the placeholder. Then, I can set the right measurements in the Properties panel.
Lastly, I drag it to the right position.
Using this technique, I can save the document as a template and easily make different sets of photo cards whenever I want.
Step 5
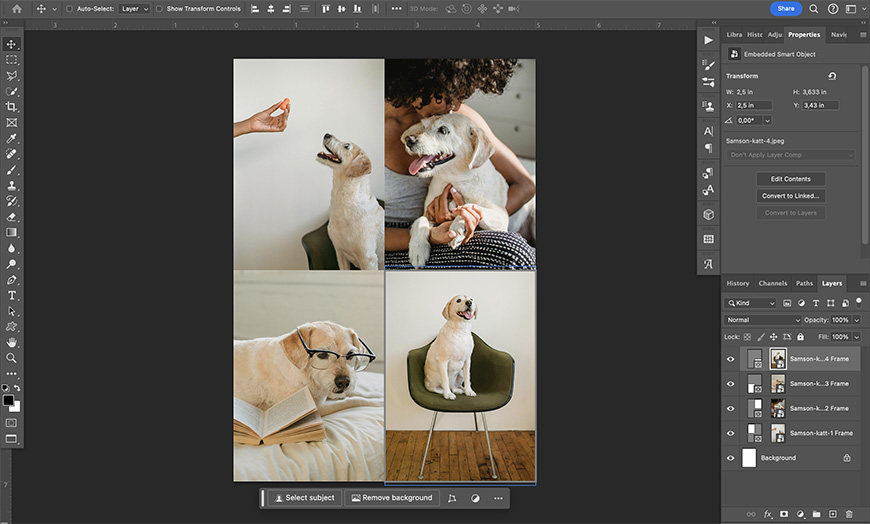
Once I have the four placeholders, I can add my images. To do so, I check that the frame I want is selected in the Layers panel.
Then, I go to File > Place Embedded and choose the right image from the browser window.
This will resize the image to fit the frame and make it a Smart Object – so it’s easy to modify or change at any time.
How Much Do You REALLY Know About Photography?! 🤔
Test your photography knowledge with this quick quiz!
See how much you really know about photography…

Once I’ve placed the images, I save the file and print it 13 times to make the 52 photo cards.
Step 6
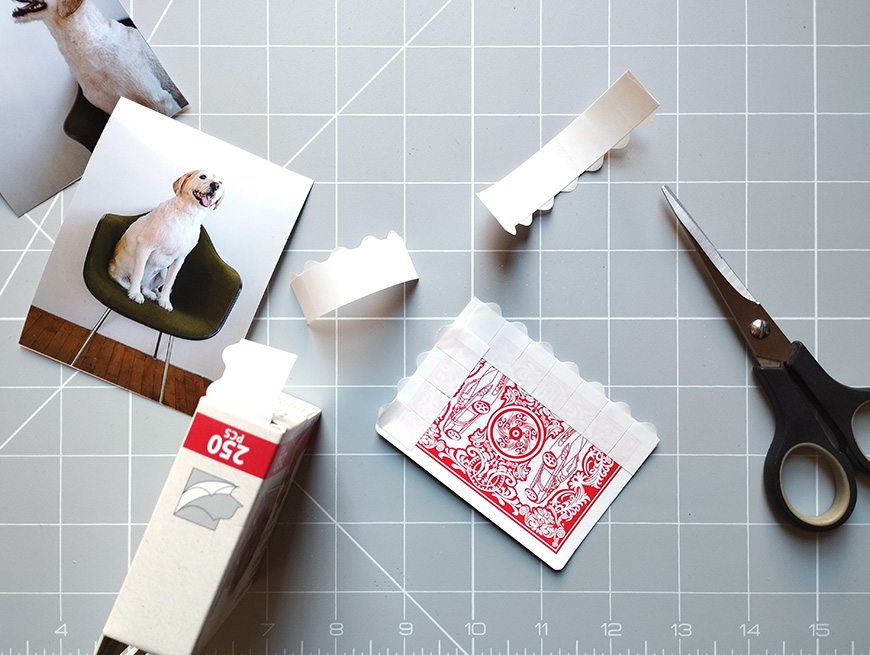
Use double-sided tape to cover the edge of the card. This may be a little tedious, so you may prefer to use glue. Both are good options, but I prefer working with tape because it’s less messy.
Step 7
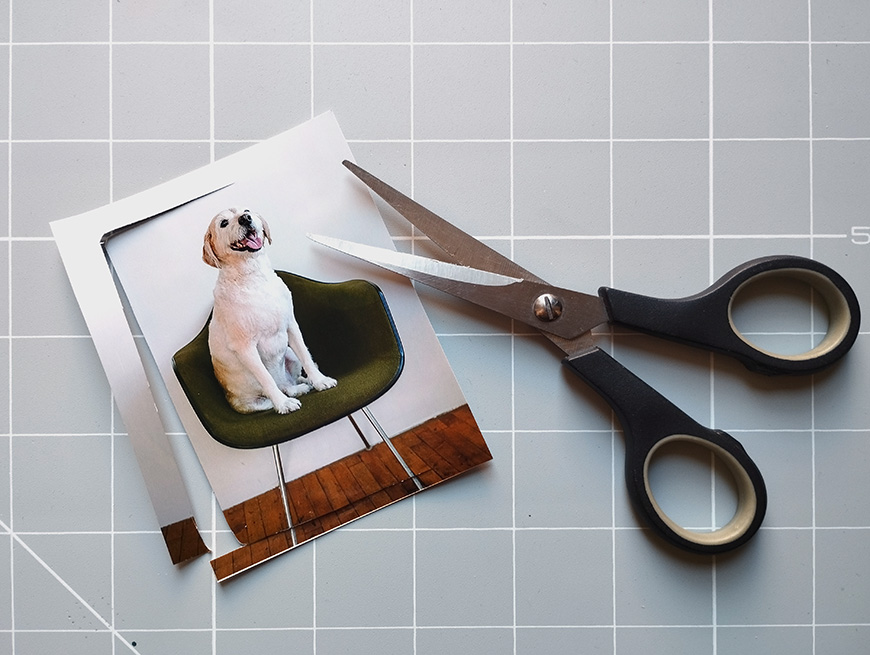
Now, paste the photo to the card. It may be that the photo is bigger than the card. This is often the case when you order your prints, like I did. Sometimes, labs change the size to fit the paper, or something goes wrong along the way.
As long as the size is bigger, it’s not a problem. Simply cut the photo following the edges of the card.
If your photo fits perfectly, you just need to round the corners.
Step 8

Repeat the process to do the entire deck, and you’re done.
You now have a cool, customized set of photo playing cards.
Credit : Source Post


