Overtourism isn’t just making it difficult to visit popular destinations; it’s also making it impossible to get a good picture of them.
Have you ever woken up at 5 am to catch a landmark without crowds, only to find that a tour bus beat you there?
Or perhaps returned from a once-in-a-lifetime trip to discover a random photo bomber ruining the perfect photo of you and your partner?
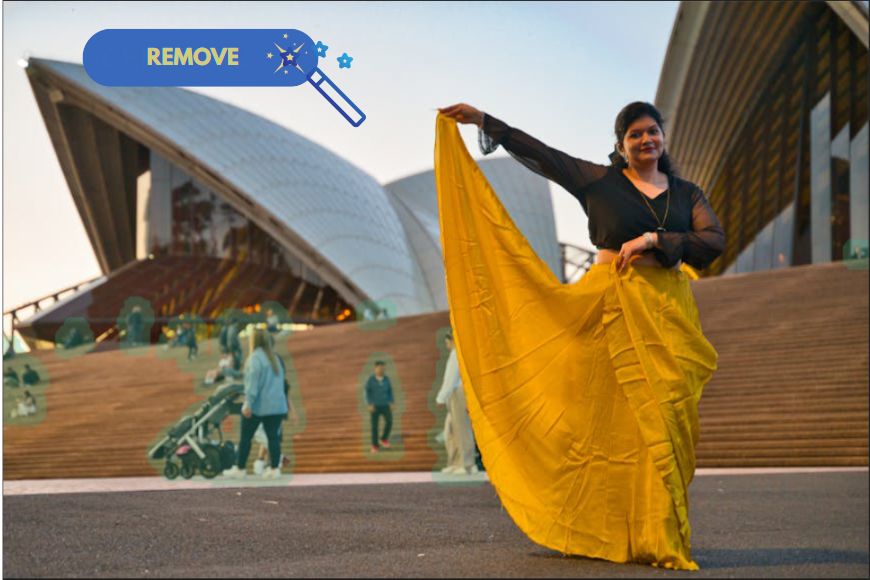
Well, thanks to AI, removing these distracting tourists from your photos is now easier than ever. With just a few clicks and no training required, you can now do the trick.
That’s why I tested multiple apps, software, and online services to find the best ones based on their ease of use, overall results, and cost.
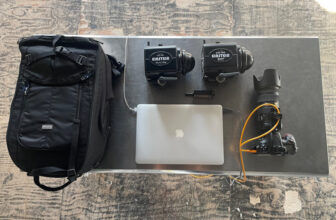
To try them, I used a collection of photos with different backgrounds, depth of field, and numbers of tourists to remove.
Whether you’re a professional photographer looking to process hundreds of images or a casual user trying to enhance a photo to frame and hang at home, this is the article for you.
Best AI Tools To Remove Tourists From Your Photos
Some of these tools are designed for professional photographers who frequently encounter crowds when photographing landmarks during portrait sessions or travel shots for stock photography, among other applications.
It’s not that these tools have a steep learning curve – they’re just as easy to use as the others. I say they’re for professionals just because they’re built into robust editing software that wouldn’t make sense for the average tourist to buy just to fix a few vacation pics.
However, I also included AI object removers that can cater to the average user looking to clean up a crowd or remove a photo bomber, with the sole intention of creating better-looking memories from their trip.
So, there’s something for everyone, and I hope you find what you need.
Let’s get started.
Lightroom
Adobe recently added the Distraction Removal feature in LR and LRc. That was in June 2025 – versions 8.4 and 14.4, respectively.
This tool has already been present in Photoshop since October 2024. However, I find that Lightroom is even more user-friendly and customizable, which is why I decided to put it at the top of the list.
Here’s how you can use the Distraction Removal feature:
Once you’ve imported your picture into the Library, move on to the Develop module.
Next, enable the Remove tool by clicking on its icon on the Tool Panel or by using the keyboard shortcut ‘Q’. This will open two new panels: Remove and Distraction Removal – you want the latter, Distraction Removal. Here, click on People.
The tool will automatically detect and select all the other tourists in the background that are cluttering up your photo.
Each one has its own mask, so you can delete the pin by clicking on it if something was wrongly selected.
You can also change the color and opacity of the mask. This is helpful in case you have the clipping alert enabled or if the image’s color palette doesn’t allow you to identify the mask clearly.

This tool is specifically designed to remove distracting people. That’s why you only need one click to fix your photo. I consistently achieved good results in all my test images, except for one.
Lightroom’s Distraction Removal tool successfully removed all the tourists in photos, even in cases where the background was busy and the narrow depth of field made everything appear blurry.
The only image where it failed to identify the distractions was a photograph where seagulls were flying in the foreground, and some even overlapped with the people in the background.
That’s fair, I chose the picture especially because of its complexity. In these cases, you can make the mask manually, and the background generated to fill the gaps will still be of excellent quality.

I also appreciate that you have different before and after views – plus, everything is non-destructive because Lightroom works on the imported copy, while your original remains safely stored.
To export the retouched picture, you have plenty of options.
If you’re already an Adobe user or want this tool integrated into a robust photo editor, this is the best choice. However, if you only need to remove a few people from a couple of photos, a Lightroom subscription will be too expensive.
Photoshop

Photoshop’s Find Distractions tool is the same as Lightroom’s Distraction Removal tool. They work with the same technology and, therefore, are both excellent. On the flip side, it means they struggle with the same images.
If you prefer using PS for your editing work, here’s how to use it. Click on the Remove tool, which is nested under the Spot Healing Brush tool in the toolbar. Make sure you’re using Photoshop 2023 or later.
Now, go to the Options bar and click Find Distractions. Then, select People. This will automatically start the scan to find and mask any distracting tourists in your photograph.
What I like about the Photoshop version of this tool is that you can choose whether to use AI or not. It’s also possible to select the Auto mode, in which it will determine which technology is best – this is the mode I use.

While this tool won’t affect your generative credits, it’s still best to avoid using AI if possible, as it takes a significant toll on the environment.
What I don’t like is that this is a destructive edit. So, make sure you’re working on a duplicate layer or you save it as a copy of the original file.
If you’re working on a duplicate layer for safety, make sure you don’t have the ‘Sample all layers’ option enabled.
You can use the brush tool available on the Options bar to customize the mask if you want to add or remove something from it. Next to it, you can also change the color and opacity of the mask by opening the Additional Options menu.

The results are consistently good, as they were with Lightroom. I didn’t need to manually adjust any of the masks, which makes the work fast and easy.
The only problem was with the seagulls photo – just the same as in Lightroom.
As I mentioned for Lightroom, this is a great option if you use Photoshop for other editing tasks; otherwise, it’s overkill.
Photos for Mac
If you have a Mac computer, an iPhone, or an iPad, this is the best option for you.
Without any extra payment, subscription, or download, you have a great tool at your disposal to remove other tourists from your vacation photos.

You simply have to import your photos into the Photos app. Then, go to Edit and click on Clean Up. This will automatically select any distracting elements in your picture.
Beware that, unlike the Photoshop and Lightroom features, this one isn’t specifically made to identify people. So, it will also select objects and animals. This may be a good or a bad thing, depending on what you want to achieve with each photo.
For example, the picture with the seagulls that Adobe software couldn’t mask was easily done in Photos.
Yes, it also deleted one of the seagulls that was overlapping the people in the background, but the overall result was a clean picture with a clear subject.

It had problems with a different picture, though – the one featuring two women sitting with a newspaper in front of Milan’s Duomo square.
Here, Photos was unable to identify the distractions. However, once I manually deleted the tourists that were closer to the camera, it started to identify others in the background.
Unfortunately, the generated pieces weren’t as good. It created weird artifacts that ruined the beautiful architecture of the Duomo.

Other than that, it performed well with the other pictures.
I liked how the mask glows, making it easy to identify. Additionally, the mask takes into account the person’s shadow, which isn’t a standard feature, as you’ll see in others.
I also liked that it’s easy to restore to the original in case you don’t like the results, and you can toggle between the before and after versions.
When working on your computer, the edits are only applied to the photograph imported to Photos, and the original file saved on your hard drive remains unchanged.
Canva

Canva is another great tool to remove other tourists from your holiday photos. Unlike the previous recommendations, you don’t need to download it to your device; you can simply use it online if you prefer.
However, you do need to create an account. Like most AI tools in Canva, it’s only available to Pro, Teams, or Enterprise membership holders; free accounts don’t have access to the Magic Eraser.
If you have a Canva subscription, simply upload your photograph or integrate it into an existing project. Then, click on it to open the floating toolbar and click on Edit.
Once you do this, you’ll see the Image panel displayed on the left side. On the Magic Studio section, select Magic Eraser.
This tool provides the option to use the brush for manual selection or the Click feature. Choosing the latter won’t automatically select the people, like Photos or Adobe software.
Instead, hover over the picture and you’ll see the identified elements highlighted – they only get selected if you click on them. In this case, it doesn’t consider the shadows as part of the elements. So, you’ll have to use the brush to add them.
You can also use the brush to select and remove any elements that weren’t identified during the scan. Once you’ve selected everything, you can click Erase.

I found the results a bit inconsistent. Some of the pictures came out great, while others had weird artifacts.
However, it handled the tricky seagulls picture quite well – it may have been the best result from all the choices, actually.
The part where it struggles the most is when the narrow depth of field creates a very blurry background, making it difficult to distinguish between the tourists and the architecture or trees behind them.

In general, I think it’s a great option, especially if you are already working on Canva for your design projects.
Again, if you’re only interested in fixing a few vacation pics, this subscription is overkill.
Pixelcut.ai
Pixelcut is a free online service that you can use without signing in.
Of course, using it this way has some limitations. One of them is that you can only download a low-resolution (1080 x 720 px) version of your edited image.
![]()
![]()
To remove this restriction, gain commercial use, or unlock the retouching tool if the first attempt wasn’t fully satisfactory, you need to sign up for a membership. There are four tiers, including a free account.
Using Pixelcut.ai to remove tourists from your photos is quite simple. Simply upload your picture and use the brush to select whatever you want to remove.
It doesn’t have an automatic selection feature, which is why I didn’t put it higher on the list. This is a shame because for the rest, it’s an excellent tool.
![]()
![]()
I found it extremely fast, and the results were good. However, sometimes it did require a second or third correction to remove artifacts created when removing people from the background.
As for the settings, it allows you to adjust the brush size and offers two quality options to choose from.
If you prefer not to use it online and sign in every time, Pixelcut.ai is also available as a mobile app for both Android and iPhone.
insMind
insMind is another online platform you can use to remove tourists from your vacation pictures. Unlike Pixelcut, you need to create an account to use it.
Upon sign-up, you receive five free credits – keep in mind that each try consumes one credit.
So, provided that you select everything in one go and the results are good enough that it doesn’t require a retouch, you can fix five pictures for free.

In my experience, most pictures came out with acceptable results without needing to be redone or retouched. However, they aren’t professional results, as they do have artifacts if you zoom in.
Yet, it’s perfect for most vacation photos that aren’t too complex. It also has a click feature to help you select the tourists you want to remove. However, it was less efficient than others.
On top of the five credit limit, you can only download a low-resolution version unless you upgrade. This also happened with Pixelcut, but in this case, the file is even smaller (500 px on the long side).

Despite that, the freebies are good enough for you to decide whether the service works for you. If it does, you can choose between subscribing or simply buying credits.
I like this as it allows you to choose based on your needs. If you decide to purchase credits, you’ll get a cheaper price per credit with the larger packages.
Memberships are also flexible depending on what you’re looking for. There’s the Pro plan, or credit plans – basically, you’ll find one more convenient than the other depending on which tools you intend to use.
In short, it’s a good service with affordable and flexible pricing plans that allow you to try it before spending anything. In that sense, what’s not to like?
MyEdit
MyEdit is another online platform I discovered during my search, which yielded good results. It’s also easy to use, but it’s not the best option if you’re looking for free alternatives.

You can use MyEdit’s remove tool without creating an account, but this will not grant you access to the AI; instead, it will utilize the traditional algorithm. That said, the results were generally good enough even without the AI technology.
Using MyEdit this way allows you one free export per day. Please consider that it will have a watermark. However, it will let you see if the results are good enough to commit to.

By signing in, you can choose to keep a free account, which will give you three credits per day. These credits have a one-month expiration date, so consider that you can’t accumulate hundreds of them for future use.
Still, the main issue isn’t this; it’s that you still can’t use the AI, and you will still get the watermark. To remove these restrictions, you’ll need to subscribe to one of the paid tiers.
Luminar Neo
Luminar Neo includes a powerful AI removal tool called GenErase, conveniently located in the right-side panel of the Catalog module – so you don’t even need to switch over to the Edit workspace.

Curiously enough, Luminar Neo is my favorite tool when I’ve had to delete someone who’s part of the main subject.
This often comes up when someone wants to use a group or couple’s photo as a profile picture, or whenever they no longer have a relationship with the person in the picture.
However, it’s listed here at the bottom of my list of the best tools for removing distracting people in the background for several reasons.
The first one is that it doesn’t have an automatic scan or selection to simplify the task. For best results, you need to select and delete each tourist manually.
Neo is great for many AI tools, having been one of the first photo editors to bet on this technology and constantly developing it over the years. Unfortunately, speed isn’t its strong suit.

So, having to erase each element individually and waiting each time for it to work can be frustrating if you have many photos or if there are many tourists in them.
You can select everything in one go and it will do the job, but the results are then inconsistent – some are great, others, not so much.
On the plus side, it has one of the friendliest tools, where you can easily deselect if you made a mistake or reset the whole selection.
It’s also easy to toggle between the before and after versions, and your originals remain untouched on your hard drive.
If you’re looking for a complete photo editor with an effective erase tool, Luminar Neo is a very affordable option, and the software as a whole is impressive.
However, if you’re only after an easy way to delete distractions from your photos, you may want to look at one of the online solutions suggested here on the list.
Credit : Source Post