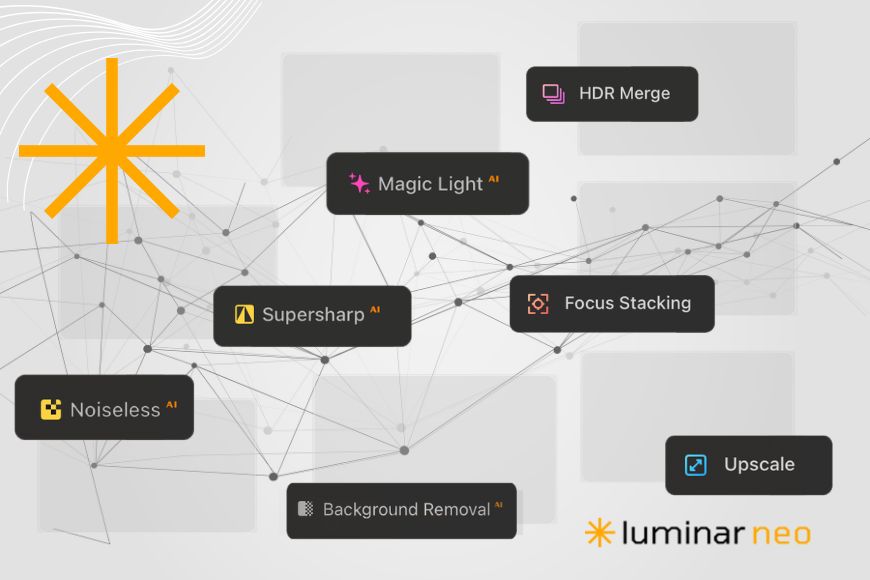
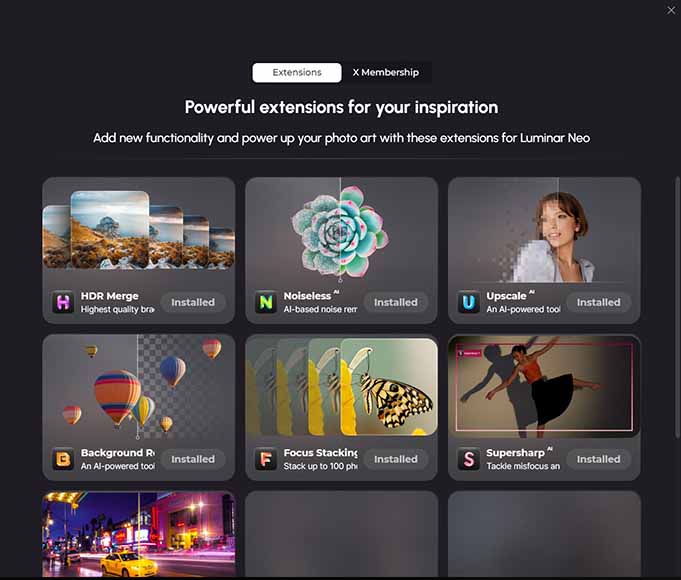
In July 2022, Skylum launched the first in a series of extensions for Luminar Neo—HDR Merge. Then, Skylum released six more exciting extensions that added enhanced functionality to Luminar Neo.
While the ability to enhance the software modularly via extensions was a key advantage of Neo over its predecessor Luminar AI, it was more expensive for the user.
Now, Skylum has decided to integrate these features directly into Luminar Neo to simplify the user experience.
Exclusive Discount
Buy the Luminar PRO plan to ensure you get all the latest Extensions included for free. (Or choose LIFETIME to buy individual extensions.)
Use code shotkit10neo to save $10
Get Discount
So, you can still use these powerful photo editing features without having to buy them, install them, or manage any extra workspaces.
In this guide, I’ll explain what extensions were available before the change, what they do, and where you can find them now in Luminar Neo.
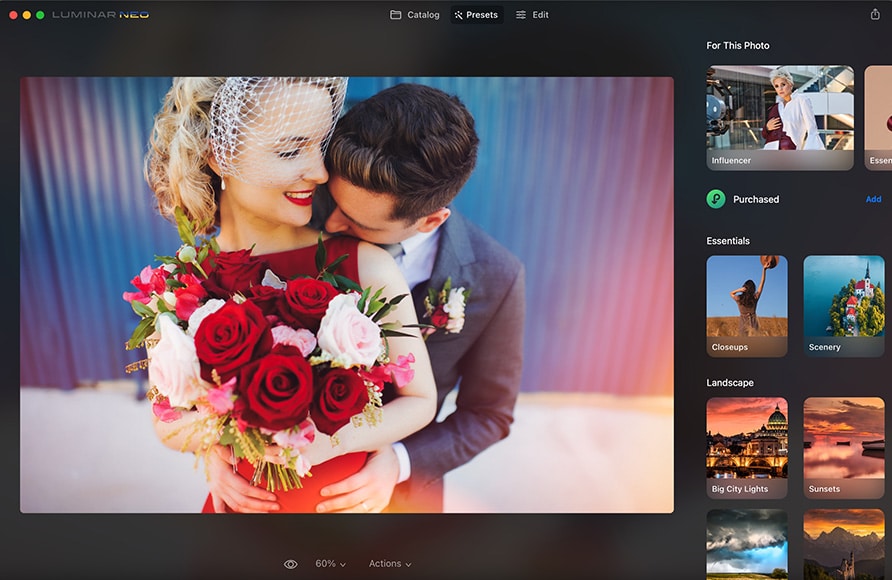
What Were Luminar Extensions?
Luminar Neo extensions were features that you could buy separately from the main software to speed up your post-processing pipeline and make beautiful adjustments to your photographs.
They could be used singularly or in combination to complement one another, bringing together various image editing techniques with powerful AI processing.
As you’ve seen in our comprehensive review of Luminar Neo, it’s already an impressively capable photo editing software.
However, with the additional tools, you could yield more benefits from Luminar Neo.
- Do Luminar Neo extensions still exist?
Yes and no. Yes, the powerful editing tools that used to be considered Extensions are still available. However, they’re now built-in features inside the Neo workspace.
Which Luminar Extensions are Still Available in 2025?
All the previous Luminar Extensions are still available inside Luminar Neo. However, they’re not called extensions anymore, and you’ll find them in different sections.
Let me tell you all about these features.
1. HDR Merge Extension

Taking multiple photographs with bracketed exposures is an excellent way to capture a greater range of information from your RAW files to use in post-processing.
With Luminar Neo, these images can be pulled together so you can extract the maximum amount of data using the platform’s HDR Merge tool.
It’s easy to use, and all you have to do to merge your images with HDR Merge is select the desired images from Luminar Neo’s Catalog and drag these into the tool’s window, which you can find in the right-hand column under Merge Tools.
Once you’ve done this, Luminar Neo will process all of the images, then render the final result for you to view and make additional edits to in the HDR Merge folder, found in the Catalog.
HDR Merge shines when used for static sets of photographs, making it a must for landscape photographers who want to maximise the high dynamic range data their camera produces.
2. Focus Stacking

As with the HDR Merge extension, Focus Stacking is another quick and effective tool that allows you to bring data from multiple photographs together to combine all their details into a new image.
This tool allows for up to 100 photographs to be dragged and dropped into its window, with Luminar Neo’s algorithms extracting the information on the depth of field to produce a crystal clear image that brings everything into focus.
Ideal for macro photography, the Focus Stacking feature also works effectively for landscape images, combining the focal lengths of each photo to ensure both foreground and background are in focus.
In addition to selecting the sharpest areas of each image, the Focus Stacking tool uses RAW file data to correct lens distortions and chromatic aberration, resulting in an even more refined final image.
When combined with the core editing functionality of Luminar, it’s our top pick for the best focus-stacking software.
You can also find this tool in the Merge Tools section on the left-side panel of the Catalog workspace – right under HDR Merge.
3. Upscale AI

Wildlife and sports photographers often find that the best parts of their images require heavy cropping, which can lead to a loss of detail and resolution.
With Luminar Neo’s Upscale AI, images can be enlarged without sacrificing resolution, while preserving warmth, sharpness, and overall vibrancy.
The tool minimizes pixelation in zoomed-in shots and unlocks new creative potential with the ability to upscale images by up to 6×.
Upscale AI works with all file formats, including non-RAW files, delivering print-worthy quality by simply dragging and dropping the desired image into the Upscale AI window.
You’ll find the Upscale AI tool on the left side of the Catalog window. Simply scroll all the way down until you find the Resolution Enhancement section.
4. Noiseless AI

Unwanted noise can easily degrade the overall quality of a photograph, introducing unpleasant artifacts and grain and detracting from the naturalness of the image.
With Luminar Neo’s Noiseless AI, noise can be reduced to a minimum or eliminated altogether with a few simple adjustments to the tool’s sliders.
To find Noiseless AI, open the picture you want to fix in the Edit workspace. Then, find the Image Quality section on the left panel.
Noiseless AI gives users three main adjustment settings to begin with: Low, Middle, and High.
The software will recommend the optimal choice from these settings, as well as give you sliders to adjust Luminosity Denoise levels, Details, and Sharpness.
There’s also the option to apply a mask and limit the areas of the image where the tool is applied – a handy feature that carries across the full range of Luminar Neo editing tools.
It’s a great feature to help you recover details from your photographs and retain a beautiful and natural look, and it can be used with RAW or JPG file types.
5. Background Removal AI

Removing the background from an image while retaining the core subject can be a time-consuming task, particularly when there’s a lot of variable detail surrounding the subject in question.
Luminar Neo’s Background Removal AI transforms a rather laborious task into one that can be accomplished in a short amount of time, with the platform’s neural network quickly identifying and isolating the subject for you.
It’s a great tool that allows users to quickly isolate and remove the background so that a new layer can be added to place the subject in a more interesting context.
The Luminar Neo Background Removal AI works on all sorts of subjects. To find it, open your photograph in the Edit window. Then, open the Layer Properties panel on the left side of the screen.
Next, click on Masking and find Background Removal AI at the bottom. If you’re working on a portrait, you might be better off with the Portrait Background feature located just above.
6. Supersharp AI

Motion blur and missed focus are surefire ways for photos to end up in the recycle bin, as post-processing tools can do little to restore sharpness once an image is blurred.
This perennial problem that all photographers have experienced at some point, whether they’re enthusiastic hobbyists or working professionals, can be quickly addressed using Luminar Neo Supersharp AI.
Subjects can end up out of focus for various reasons, such as accidentally moving the camera before taking the shot or using a slower shutter speed when the subject is in motion. Supersharp AI utilizes powerful algorithms to compensate for these flaws.
The tool allows users to add sharpness at a Low, Middle, or High threshold, which can be set to affect the image universally or in combination with masks to select key areas you wish to bring back into focus.
There’s also a Face Enhancer AI checkbox that can be used to speed up the process when sharpening portraits. This feature can be applied by simply selecting the designated checkbox.
Motion blur issues can also be addressed with the same degree of finesse, again with the Low, Middle, and High threshold options to fine-tune the degree to which the tool is applied to an image.
It’s another great feature that can be used to salvage images and save time by avoiding otherwise lengthy post-processing techniques, and it works well in combination with Noiseless AI to create sharp and vibrant photographs.
You’ll find this amazing tool under the Image Quality panel in the Edit workspace – right under Noiseless AI.
7. Magic Light AI

The final feature of Luminar Neo I’ll be looking at is the Magic Light AI, which, as the name suggests, is all about enhancing any light sources featured in a given photograph.
Street lights, sunlight, and other light sources are identified by the tool’s artificial intelligence, with a raft of sliders that can be used to enhance or diminish their impact on the image.
This includes sliders to increase or decrease the luminosity and size of the light source, as well as adjusting the beam width, level of glow, and clarity and brightness.
Additional sliders can be used to increase the number of beams from each light source and adjust the rotation of the light beams to achieve the desired orientation and effect.
As with the other features in Luminar Neo, there’s the option to apply a mask to limit the application of the Magic Light AI tool to specific sources of light, allowing for different light sources to be manipulated independently.
It’s another powerful tool that can be used to quickly enhance photographs, this time by creating a more dynamic and expressive use of luminosity.
You’ll find it in the Creative panel on the left side of the Edit workspace.
Final Thoughts
Luminar Neo was already a powerful editing tool and our number-one alternative to Lightroom.
The extensions were like icing on the cake: the cake was already delicious, but the icing just gave it that extra edge!
However, they also added unnecessary complexity to the workflow and came with extra costs. Turning them into built-in features was, in my opinion, a winning move from Skylum.
While these features aren’t necessary for everyone, and indeed, I won’t be using all seven of them every day in my workflow, a couple of them are really useful for speeding up your regular editing.
The extensions allow you to perform tasks that other editing programs simply can’t handle.
Sure, there are other apps like Topaz Gigapixel that can upscale photos, for example, but it costs more than Luminar Neo, and can only perform the one task.
If you purchase a perpetual license, you’ll gain instant access to all these tools inside the amazing editor that is Neo. It’s the best value for your money.
Tap the button below to see the pricing in your currency, and happy editing!
Exclusive Discount
Buy the Luminar PRO plan to ensure you get all the latest Extensions included for free. (Or choose LIFETIME to buy individual extensions.)
Use code shotkit10neo to save $10
Get Discount
Credit : Source Post